This chapter is for more advanced users. It allows you to work on the code, while allowing other users to see the stable version of your data first. Branches are also a way to make changes that can be easily trashed.
So you have your project and you want to add something new or try something out before reflecting the changes in the main project folder. To add something new, you can continue editing your files and save them with the proposed changes. Suppose you want to try something without reflecting the changes in the central repository. In that case, you can use the “branching” feature of more advanced version control systems such as Git. A branch creates a local copy of the main repository where you can work and try new changes. Any work you do on your branch will not be reflected on your main project (referred to as your main branch) so it remains secure and error-free. At the same time, you can test your ideas and troubleshoot in a local branch.
When you are happy with the new changes, you can introduce them to the main project. The merge feature in Git allows the independent lines of development in a local branch to get integrated into the main branch.

Figure 1:The development and main branch in Git.
You can have more than one branch off of your main copy. If one of your branches ends up not working, you can either abandon it or delete it without impacting the main branch of your project.

Figure 2:Two development branches and one main branch in Git.
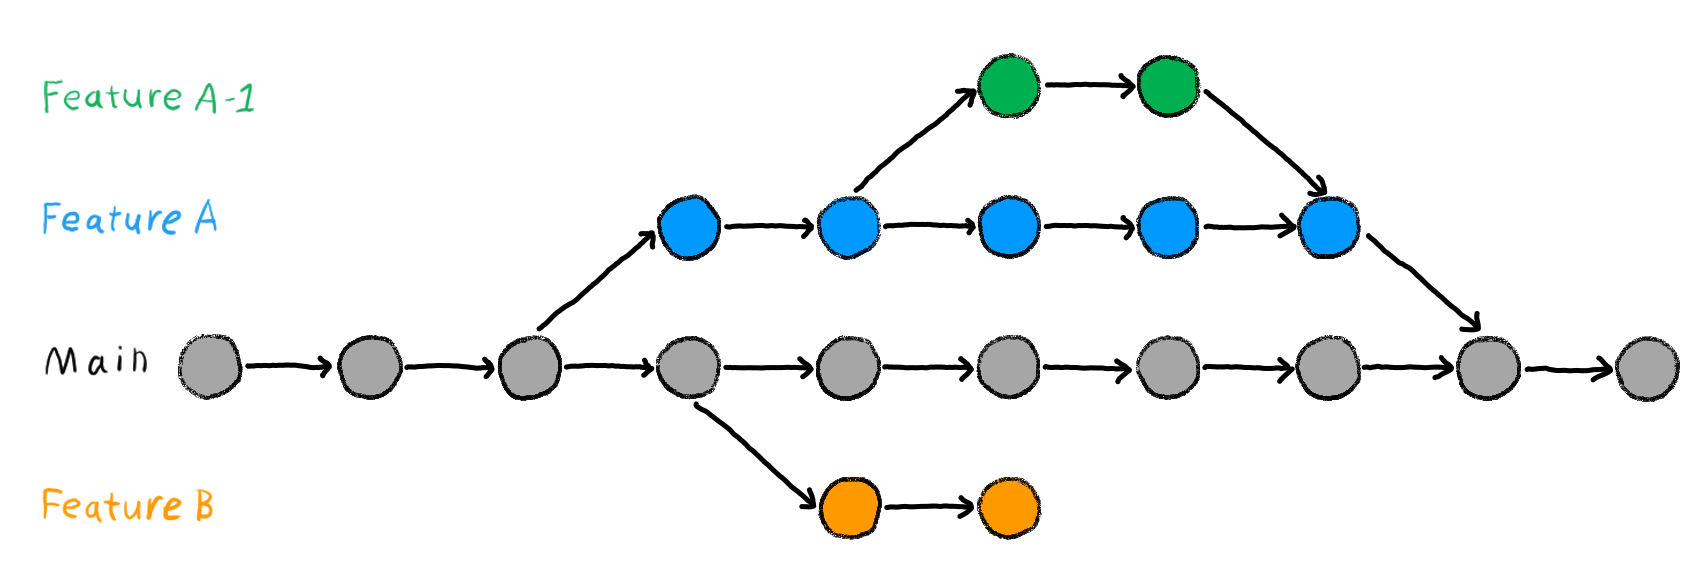
If you want, you can create branches from branches (and branches off of those branches and so on).

Figure 3:Several development branches in Git.
No matter how many branches you have, you can access the past versions you made on any of them. If you are curious to know how to use this feature in practice, you will find more details a few sections ahead.